
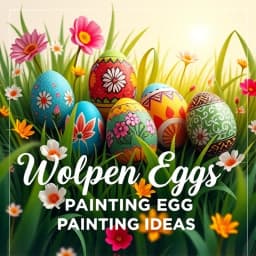
Wooden Easter Egg Painting Ideas
Find this useful? Bookmark ( CTRL/CMD + D ) for quick access!
Try an example:
Traditional Floral Patterns
Modern Geometric Designs
Animal-Themed Paintings
Pastel Color Schemes
Nature-Inspired Scenes
Personalized Family Portraits
Press Enter to send. Shift+Enter for New line
Explore Similar Tools


Recent Generations
Taco Bar Party Ideas
the amount paid directly to you. Yes it is possible in future cases to request direct payment to the provider, Rephrase and give me polished email.
Claim Email Template
we have processed the claim as per the attachments in the claim submission we have processedthe invoice for Saul Holding. We dont have invoice for the Salofalk.
Claim Email Template
this additional information is very important. this adiitional information was requested by our clinical team. Without clinical review claim not be paid so please share the below additional information
Wooden Easter Egg Painting Ideas
Wooden Easter Egg Painting Ideas is a creative AI-powered tool designed to inspire and guide users in crafting beautiful and unique wooden Easter eggs. This innovative solution combines artistic suggestions with step-by-step instructions, making it easy for anyone to create stunning decorations for the Easter holiday.
Key Capabilities
- Diverse Design Suggestions: Access a wide range of painting ideas, from traditional patterns to modern designs, ensuring every egg is a masterpiece.
- Step-by-Step Tutorials: Follow easy-to-understand instructions that guide users through the painting process, making it accessible for all skill levels.
- Color Palette Recommendations: Get personalized color combinations that enhance the visual appeal of your wooden eggs, ensuring vibrant and eye-catching results.
- Seasonal Themes: Explore seasonal and holiday-specific themes that keep your Easter celebrations fresh and exciting year after year.
Who It's For
Designed for crafters, families, and DIY enthusiasts, Wooden Easter Egg Painting Ideas excels in providing creative solutions for Easter celebrations. Whether you're looking to engage children in a fun activity or seeking unique decorations for your home, this tool streamlines the creative process and enhances your artistic expression.
Why Choose Wooden Easter Egg Painting Ideas
What sets Wooden Easter Egg Painting Ideas apart is its ability to blend creativity with practicality, making it the ideal solution for anyone looking to elevate their Easter festivities. With its user-friendly interface and extensive design options, you can unleash your inner artist and create memorable holiday decorations.
Ready to transform your Easter celebrations? Start using Wooden Easter Egg Painting Ideas today and experience the joy of crafting beautiful wooden eggs!
Enhance Your Work with Wooden Easter Egg Painting Ideas
Leverage the power of AI to streamline your tasks with our Wooden Easter Egg Painting Ideas tool.
Creative Design Suggestions
Explore a variety of unique and creative painting ideas for your wooden Easter eggs, tailored to different themes and styles.
Layered Techniques
Learn about different painting techniques, including layering and blending, to enhance the beauty of your Easter egg designs.
Customizable Templates
Access customizable templates that allow you to easily create stunning designs, perfect for any skill level.
How Wooden Easter Egg Painting Ideas Works
Discover the simple process of using Wooden Easter Egg Painting Ideas to improve your workflow:
01
Choose Your Base Egg
Select the type and size of wooden egg you want to paint.
02
Select Painting Techniques
Explore various painting techniques such as sponge, brush, or stencil.
03
Pick Your Color Palette
Choose from a wide range of colors to create your unique design.
04
Finalize Your Design
Review and finalize your painting ideas before starting your project.
Use Cases of
Wooden Easter Egg Painting Ideas
Explore the various applications of Wooden Easter Egg Painting Ideas in different scenarios:
Creative Inspiration for Families
Provide families with unique and fun painting ideas for wooden Easter eggs, encouraging creativity and bonding during the holiday season.
Art Workshops and Classes
Assist art instructors in developing engaging lesson plans and activities focused on painting wooden Easter eggs, suitable for various age groups.
DIY Craft Projects
Offer DIY enthusiasts a variety of painting techniques and designs for wooden Easter eggs, enhancing their crafting skills and project variety.
Seasonal Marketing Campaigns
Help businesses create themed marketing campaigns around Easter by providing them with trendy and appealing wooden egg painting ideas to attract customers.
Who Benefits from Wooden Easter Egg Painting Ideas?
AI-Powered Efficiency
From individuals to large organizations, see who can leverage Wooden Easter Egg Painting Ideas for improved productivity:
Art Enthusiasts
Discover creative and unique painting ideas for wooden Easter eggs to enhance your artistic skills.
Families with Children
Engage in fun and educational activities with your kids by painting wooden Easter eggs together.
Crafters and Hobbyists
Find inspiration for DIY projects and create beautiful, personalized gifts for loved ones.
Event Planners
Incorporate unique wooden Easter egg painting ideas into holiday events and gatherings.
Frequently Asked Questions
What types of painting ideas does the AI provide for wooden Easter eggs?
The AI generates a wide variety of painting ideas, including traditional designs, modern patterns, and unique artistic concepts. Users can explore themes like floral, geometric, or even character-based designs.
Can I customize the painting ideas generated by the AI?
Yes, users can customize the ideas by specifying colors, styles, and themes they prefer. The AI will then tailor the suggestions to fit those preferences.
Is there a limit to the number of ideas I can generate?
No, there is no limit to the number of painting ideas you can generate. You can request as many ideas as you like, making it easy to find the perfect design for your wooden Easter eggs.
Do I need any special skills to use the painting ideas provided by the AI?
Not at all! The painting ideas cater to all skill levels, from beginners to advanced artists. Each idea includes tips and techniques to help you achieve the desired results.
Can I share the painting ideas with friends or family?
Yes, you can easily share the painting ideas generated by the AI through social media, email, or by printing them out. This makes it fun to collaborate on Easter egg painting projects with others.