
How to Write a Check for 3000 Dollars
Find this useful? Bookmark ( CTRL/CMD + D ) for quick access!
Try an example:
Personal Check Writing
Business Payment Instructions
Gift Check Creation
Charitable Donation Check
Rent Payment Example
Freelance Invoice Payment
Press Enter to send. Shift+Enter for New line
Explore Similar Tools


Recent Generations
Taco Bar Party Ideas
the amount paid directly to you. Yes it is possible in future cases to request direct payment to the provider, Rephrase and give me polished email.
Claim Email Template
we have processed the claim as per the attachments in the claim submission we have processedthe invoice for Saul Holding. We dont have invoice for the Salofalk.
Claim Email Template
this additional information is very important. this adiitional information was requested by our clinical team. Without clinical review claim not be paid so please share the below additional information
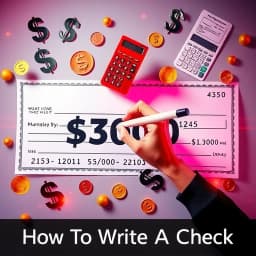
How To Write A Check For 3000 Dollars
How To Write A Check For 3000 Dollars is a user-friendly guide designed to assist individuals in accurately writing checks for significant amounts. This comprehensive resource simplifies the process, ensuring that users can confidently manage their financial transactions without any errors.
Key Capabilities
- Step-by-step instructions for writing checks, ensuring clarity and accuracy in every transaction.
- Visual examples of completed checks, helping users understand the correct format and placement of information.
- Tips on common mistakes to avoid, enhancing users' confidence in their check-writing skills.
- Guidance on check security, providing insights on how to protect against fraud and ensure safe transactions.
Who It's For
Designed for anyone who needs to write checks, How To Write A Check For 3000 Dollars is especially beneficial for individuals managing personal finances, small business owners, or anyone unfamiliar with the check-writing process. Whether you're paying bills, making a purchase, or handling business transactions, this guide streamlines your financial dealings.
Why Choose How To Write A Check For 3000 Dollars
What sets How To Write A Check For 3000 Dollars apart is its clear, concise approach to a potentially confusing task, making it the ideal solution for anyone looking to master the art of check writing.
Ready to transform your financial transactions? Start using How To Write A Check For 3000 Dollars today and experience the difference in your check-writing confidence!
Enhance Your Work with How to Write a Check for 3000 Dollars
Leverage the power of AI to streamline your tasks with our How to Write a Check for 3000 Dollars tool.
Step-by-Step Guidance
Receive clear, step-by-step instructions on how to properly fill out a check for $3000, ensuring accuracy and compliance.
Check Validation
Verify the details of your check with built-in validation checks to prevent common mistakes and ensure the check is correctly formatted.
Customizable Templates
Access customizable check templates that allow you to easily input your information and print checks directly from the tool.
How How to Write a Check for 3000 Dollars Works
Discover the simple process of using How to Write a Check for 3000 Dollars to improve your workflow:
01
Gather Necessary Information
Collect all required details such as the date, payee name, and amount to be written on the check.
02
Fill Out the Check
Enter the collected information on the check, ensuring accuracy in the amount and payee details.
03
Review Your Check
Double-check all entries for correctness, including the amount in both numeric and written form.
04
Sign and Issue the Check
Sign the check and deliver it to the payee, ensuring it is securely handed over.
Use Cases of
How to Write a Check for 3000 Dollars
Explore the various applications of How to Write a Check for 3000 Dollars in different scenarios:
Personal Finance Management
Guide individuals on how to write a check for $3000 to manage personal expenses, such as paying for a large purchase or settling bills.
Business Transactions
Assist small business owners in understanding the process of writing a check for $3000 for vendor payments or service fees.
Educational Purposes
Provide students with a practical example of writing a check for $3000 as part of financial literacy education.
Charitable Donations
Help individuals or organizations learn how to write a check for $3000 for charitable contributions or fundraising events.
Who Benefits from How to Write a Check for 3000 Dollars?
AI-Powered Efficiency
From individuals to large organizations, see who can leverage How to Write a Check for 3000 Dollars for improved productivity:
Individuals
Learn how to write checks accurately for personal transactions and manage finances effectively.
Small Business Owners
Understand the process of writing checks for business expenses and payments to vendors.
Accountants
Ensure compliance and accuracy in financial documentation by mastering check writing.
Students
Gain essential financial literacy skills by learning how to write checks for tuition and other expenses.
Frequently Asked Questions
What information do I need to write a check for 3000 dollars?
To write a check for 3000 dollars, you need the date, the name of the payee, the amount in both numbers and words, your signature, and your bank account information.
Is there a specific format I should follow when writing a check?
Yes, when writing a check, you should follow a standard format: write the date in the top right corner, the payee's name on the 'Pay to the Order of' line, the amount in numbers in the box, and the amount in words on the line below. Finally, sign the check at the bottom right.
What if I make a mistake while writing the check?
If you make a mistake, it's best to void the check and write a new one. You can write 'VOID' across the check to prevent it from being cashed, and keep a record of it for your records.
Can I write a check for 3000 dollars if my account balance is lower?
No, you should not write a check for an amount greater than your account balance, as this can result in overdraft fees and potential legal issues. Always ensure you have sufficient funds before issuing a check.
Are there any fees associated with writing a check?
Generally, there are no fees for writing a check, but some banks may charge fees for overdrafts or if you have insufficient funds. It's best to check with your bank for their specific policies.